This is the method I use.
- Draw shape
- Type text
- Select both
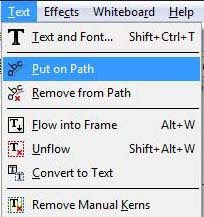
- Text>Put on Path
- relocate text along path and kern text
- Path>Object to Path
- path can now be removed.
- save file.
Screenshots below. Click on image for a larger view.

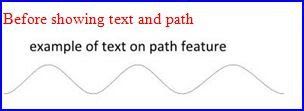
type text, draw line, Text>Put on Path.


After Text>Put on Path further changes can be applied.
In the example below, I placed the cursor in front of the first letter and used the space bar to move the wording further along the path.

After moving the words along the path, the letters are too close in a few places.
I just placed the cursor to the left of the letter to be moved and Alt→ to alter the spacing.
The same kerning principles apply to text on path. See here for more on kerning.

- Path>Object to Path.
- delete path.
- save file.

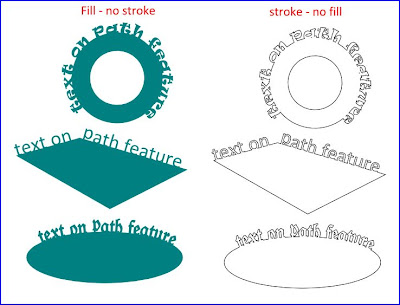
Text can be placed on closed paths, open paths and freehand drawn paths.
Text on a closed path.
- draw shape
- type text
- select both
- Text>Put on Path
- by default the text is placed underneath the oval. Rotate until text is on top of shape.
- kern text.
- select oval and text, then Path>Object to Path.
- delete the oval.
- Select text, then Path>Union.
- Save file.
Click on image for a larger view.

Visit Heather M's blog to see how to put text on the top and bottom of a circle and oval. Heather also has many other great easy to follow tutorials on her blog for users of Inkscape and SCAL.
Text inside an oval.
For the example I used the same text and oval as above.
Draw shape, write text, select both, then Text>Put on Path.
I then selected the oval only and flipped it horizontal. The text is now inside the oval.
- kern text
- select all, then Path>Object to Path.
- delete the oval.
- select text, then Path>Union.
- save file.

Update added 21st July.
I just found a great video tutorial showing this feature. Here is the link to "Place Text Around a Circle" at screencasters.heathenx.org.
Update added 7th October
Visit Heather M's blog to see how to put text on the top and bottom of a circle and oval. Heather also has many other great easy to follow tutorials on her blog for users of Inkscape and SCAL.
Update added 7th October
Visit Heather M's blog to see how to put text on the top and bottom of a circle and oval. Heather also has many other great easy to follow tutorials on her blog for users of Inkscape and SCAL.


